[NOTION] 노션 깃허브 블로그 자동 연동하기
업데이트:
※ 본 포스팅은 lourcode 님의 글을 참고하였습니다.(원본링크 : https://lourcode.kr/posts/Jekyll-기반-Github-Pages와-Notion-Page-연동/)
1. API 키 설정
1-1. 아래 주소 클릭
https://www.notion.so/my-integrations
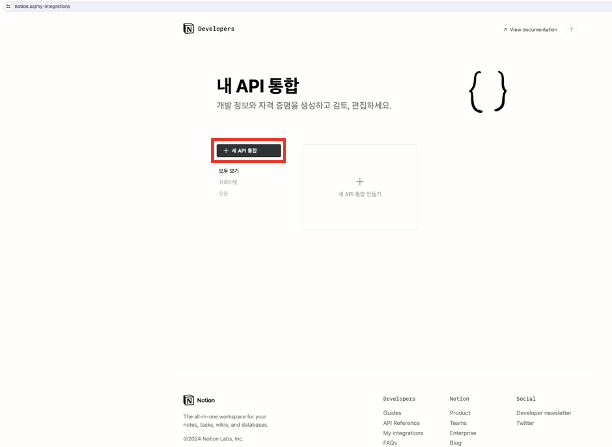
1-2. 새 API 통합 클릭
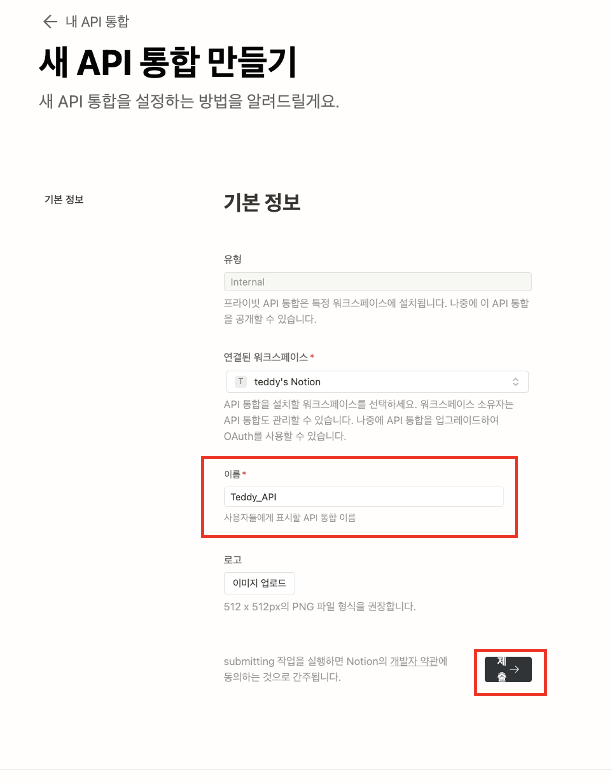
1-3. 연결된 워크스페이스를 확인하고 이름을 만들어주고 ‘제출’ 버튼 클릭
1-4. 시크릿키가 생성되면 표시 → 복사 를 순서대로 클릭하여 키값을 복사한다.
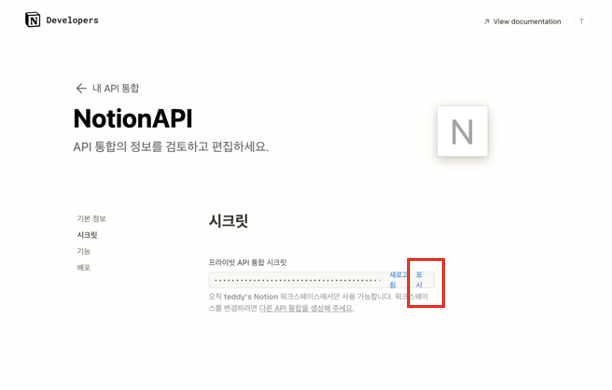
※ 시크릿키값은 secret_* 의 형태로 되어있다.
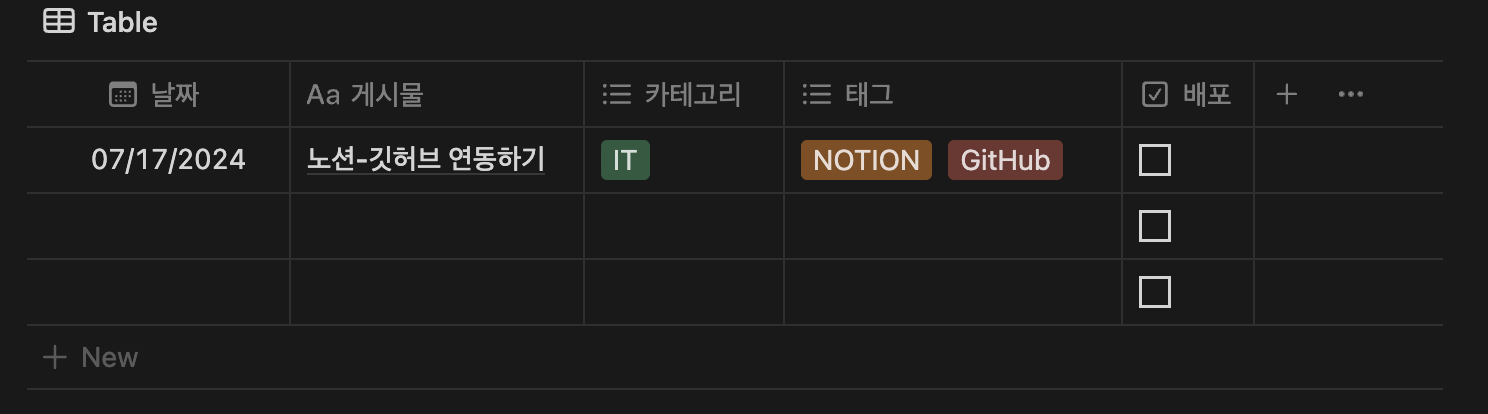
2. 노션에서 사용/연동 할 데이터베이스 생성
2-1. 아래와 같이 샘플용으로 만들어본다.(공유링크 : https://asteriskos.notion.site/Blog-DB-85109cf911b74a62a5041f6047d5792d?pvs=4)
2-2. 테이블에 마우스를 가져가 되면 옆에 더보기(::)가 표시되는데 클릭한다.

2-3. 링크복사를 누른다
https://www.notion.so/asteriskos/de2dcf74aff44030954dbd4d991c559b?v=1f7e542c866341c1a8d68c9c328c3faf&pvs=4
표시한 부분이 데이터베이스의 ID 이다. 기억해둔다.
3. 데이터베이스 페이지에 API연동
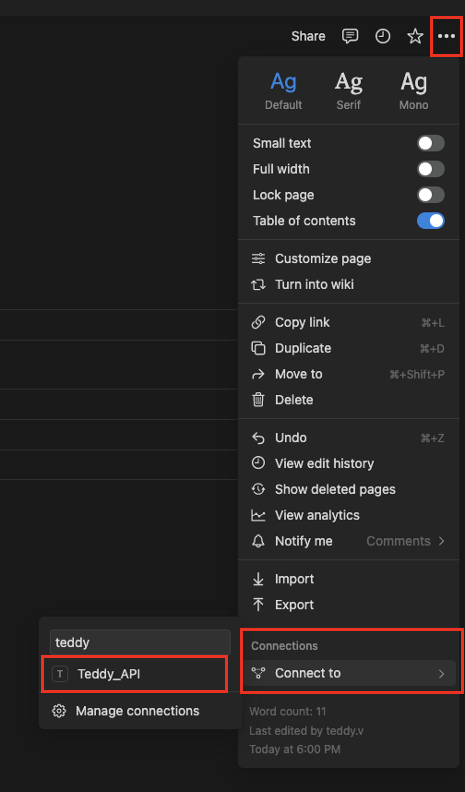
3-1. 데이터베이스 생성한 페이지 우측상단에 더보기(…) 를 클릭하여 API를 연동한다.
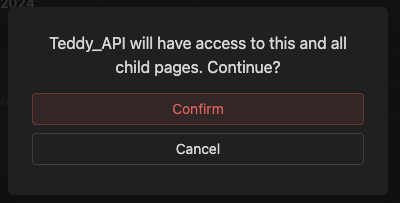
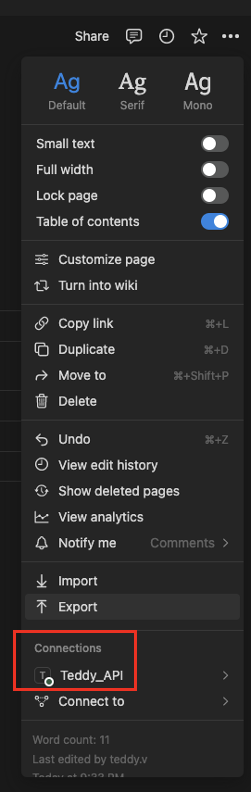
3-2. 연결할거냐는 팝업이뜨는데, ‘확인’ 버튼을 눌러 연결됨을 확인하자.
4. 깃허브 파일 설정
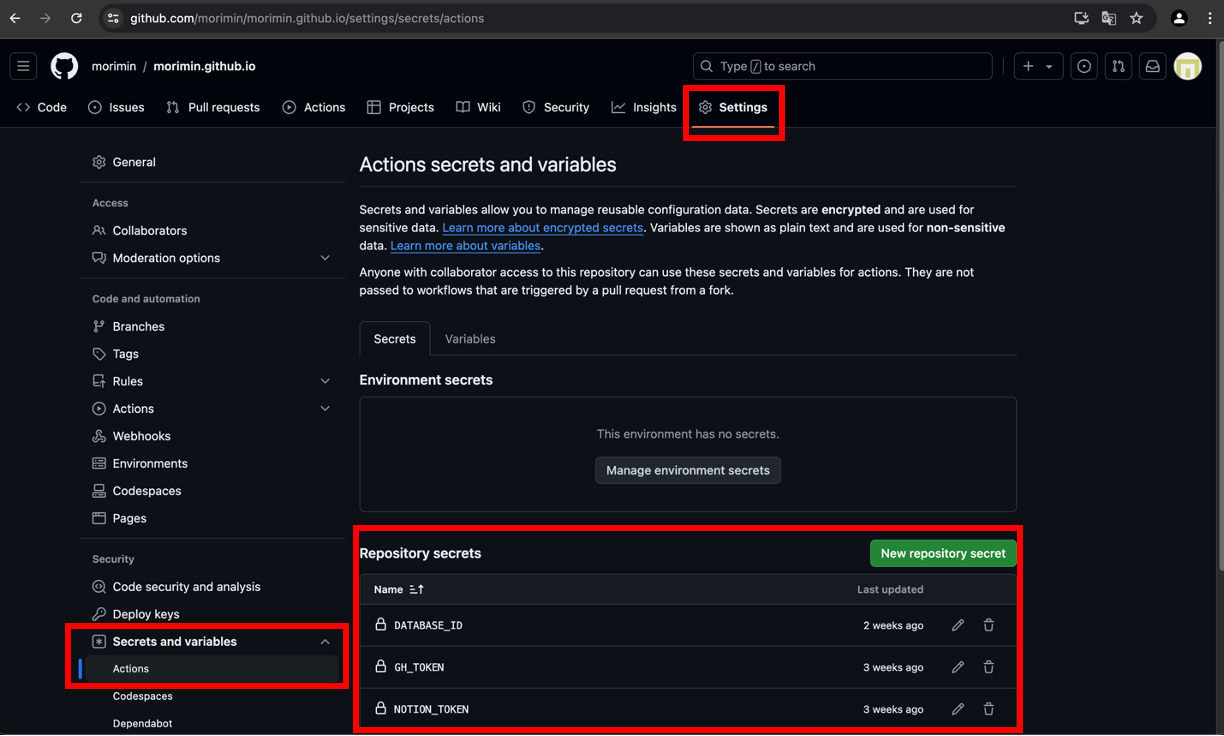
4-1. Settings → Secrets and variables → Actions 를 눌러 키를 생성해야한다.
   4-1-1. '1-4' 에서 확보한 노션토큰을 'NOTION_TOKEN'으로 저장한다.

   4-1-2. '2-3' 에서 확보한 DB ID를 'DATABASE_ID' 로 저장한다.

   4-1-2. '깃허브 personalKey'를 'GH_TOKEN' 으로 저장한다.
4-2. root 폴더에 ‘_scripts’ 폴더를 생성하고, 생성한 폴더 안에 ‘notion-import.js’ 파일을 만들고 아래 내용을 입력한다.
const { Client } = require("@notionhq/client");
const { NotionToMarkdown } = require("notion-to-md");
const moment = require("moment");
const path = require("path");
const fs = require("fs");
const axios = require("axios");
const notion = new Client({
auth: process.env.NOTION_TOKEN,
});
function escapeCodeBlock(body) {
const regex = /```([\s\S]*?)```/g
return body.replace(regex, function (match, htmlBlock) {
return "\n```\n" + htmlBlock + "\n```\n";
})
}
function replaceTitleOutsideRawBlocks(body) {
const rawBlocks = [];
const placeholder = "%%RAW_BLOCK%%";
body = body.replace(/[\s\S]*?/g, (match) => {
rawBlocks.push(match);
return placeholder;
});
const regex = /\n#[^\n]+\n/g;
body = body.replace(regex, function (match) {
return "\n" + match.replace("\n#", "\n##");
});
rawBlocks.forEach(block => {
body = body.replace(placeholder, block);
});
return body;
}
// passing notion client to the option
const n2m = new NotionToMarkdown({ notionClient: notion });
(async () => {
// ensure directory exists
const root = "_posts";
fs.mkdirSync(root, { recursive: true });
const databaseId = process.env.DATABASE_ID;
let response = await notion.databases.query({
database_id: databaseId,
filter: {
property: "배포",
checkbox: {
equals: true,
},
},
});
const pages = response.results;
while (response.has_more) {
const nextCursor = response.next_cursor;
response = await notion.databases.query({
database_id: databaseId,
start_cursor: nextCursor,
filter: {
property: "배포",
checkbox: {
equals: true,
},
},
});
pages.push(...response.results);
}
for (const r of pages) {
const id = r.id;
// date
let date = moment(r.created_time).format("YYYY-MM-DD");
let pdate = r.properties?.["날짜"]?.["date"]?.["start"];
if (pdate) {
date = moment(pdate).format("YYYY-MM-DD");
}
// title
let title = id;
let ptitle = r.properties?.["게시물"]?.["title"];
if (ptitle?.length > 0) {
title = ptitle[0]?.["plain_text"];
}
// tags
let tags = [];
let ptags = r.properties?.["태그"]?.["multi_select"];
for (const t of ptags) {
const n = t?.["name"];
if (n) {
tags.push(n);
}
}
// categories
let cats = [];
let pcats = r.properties?.["카테고리"]?.["multi_select"];
for (const t of pcats) {
const n = t?.["name"];
if (n) {
cats.push(n);
}
}
// frontmatter
let fmtags = "";
let fmcats = "";
let fmassrtmnt = "";
if (tags.length > 0) {
fmtags += "[";
for (const t of tags) {
fmtags += t + ", ";
}
fmtags += "]";
}
if (assrtmnt.length > 0) {
fmassrtmnt += "[";
for (const t of assrtmnt) {
fmassrtmnt += t ;
}
fmassrtmnt += "]";
}
const fm = `---
title: "${title}"
excerpt: ""
header: ""
categories:
- ${fmcats}
tags:
- ${fmtags}
last_modified_at: ${date}
---
<br><br>
`;
const mdblocks = await n2m.pageToMarkdown(id);
let body = n2m.toMarkdownString(mdblocks)["parent"];
if (body === "") {
continue;
}
body = escapeCodeBlock(body);
body = replaceTitleOutsideRawBlocks(body);
const ftitle = `${date}-${title.replaceAll(" ", "_")}.md`;
let index = 0;
let edited_md = body.replace(
/!\[(.*?)\]\((.*?)\)/g,
function (match, p1, p2, p3) {
// const dirname = path.join("assets/img", ftitle);
const dirname = path.join("upload", ftitle);
if (!fs.existsSync(dirname)) {
fs.mkdirSync(dirname, { recursive: true });
}
const filename = path.join(dirname, `${index}.png`);
axios({
method: "get",
url: p2,
responseType: "stream",
})
.then(function (response) {
let file = fs.createWriteStream(`${filename}`);
response.data.pipe(file);
})
.catch(function (error) {
console.log(error);
});
let res;
if (p1 === "") res = "";
else res = `_${p1}_`;
return `${res}`;
}
);
//writing to file
fs.writeFile(path.join(root, ftitle), fm + edited_md, (err) => {
if (err) {
console.log(err);
}
});
}
})();
4-3. 위 JavaScript 파일(notion-import.js)에 대한 dependencies 설정을 위해 ‘package.json’ 파일 하단에 아래 내용을 입력 해 준다.
name: "Build and Deploy"
on:
  repository_dispatch:
    types: [RUN_WORKFLOW_DISPATCH]

permissions:
  contents: write
  pages: write
  id-token: write

# Allow one concurrent deployment
concurrency:
  group: "pages"
  cancel-in-progress: true

jobs:
  importer:
    runs-on: ubuntu-latest

    steps:
      - uses: actions/checkout@master
      - uses: actions/setup-node@v3
        with:
          node-version: "17"

      - run: npm install

      - run: node _scripts/notion-import.js
        env:
          NOTION_TOKEN: $
          DATABASE_ID: $

      - uses: stefanzweifel/git-auto-commit-action@v4
        env:
          GITHUB_TOKEN: $
        with:
          commit_message: "[BOT] Commit & Deploy from Notion"
          branch: main
          commit_user_name: morimin-bot 🤖
          commit_user_email: morimin@github.com
          commit_author: morimin-bot 🤖 <morimin@github.com>

  build:
    needs: importer
    runs-on: ubuntu-latest

    steps:
      - name: Checkout
        uses: actions/checkout@v3
        with:
          ref: main
          fetch-depth: 1

      - name: Setup Pages
        id: pages
        uses: actions/configure-pages@v1

      - name: Setup Ruby
        uses: ruby/setup-ruby@v1
        with:
          ruby-version: '3.1' # reads from a '.ruby-version' or '.tools-version' file if 'ruby-version' is omitted
          bundler-cache: true

      - name: Build site
        run: bundle exec jekyll b -d "_site$"
        env:
          JEKYLL_ENV: "production"

      - name: Test site
        run: |
          bundle exec htmlproofer _site --disable-external --check-html --allow_hash_href

      - name: Upload site artifact
        uses: actions/upload-pages-artifact@v1
        with:
          path: "_site$"

  deploy:
    environment:
      name: github-pages
      url: $
    runs-on: ubuntu-latest
    needs: build
    steps:
      - name: Deploy to GitHub Pages
        id: deployment
        uses: actions/deploy-pages@v1
4-4. root 폴더에 ‘.github’ 폴더를 생성하고, 생성한 폴더 안에 ‘workflows’ 폴더를 생성하고, 생성한 폴더 안에 ‘pages-deploy.yml’ 파일을 만들고 아래 내용을 입력한다.
<!DOCTYPE html>
<html>
<head>
  <meta charset="UTF-8">
  <style>
    .trigger-container {
      display: flex;
      flex-direction: column;
      align-items: center;
      text-align: center;
    }

    .trigger-button {
      display: inline-block;
      margin-bottom: 10px;
      padding: 10px 20px;
      background-color: #4c9aff;
      color: white;
      font-size: 16px;
      border: none;
      cursor: pointer;
      border-radius: 4px;
      box-shadow: 0px 2px 6px rgba(0, 0, 0, 0.1);
      transition: background-color 0.3s;
    }

    .trigger-button:hover {
      background-color: #2e86ff;
    }

    .message {
      font-size: 16px;
      color: #333;
    }
  </style>
</head>
<body>
  <div class="trigger-container">
    <button id="triggerButton" class="trigger-button">UPLOAD</button>
    <div id="message" class="message"></div>
  </div>

  <script>
  document.getElementById("triggerButton").addEventListener("click", function() {
    var messageElement = document.getElementById("message");
    messageElement.textContent = "요청 전송 중...";

    var xhr = new XMLHttpRequest();
    xhr.open("POST", "https://api.github.com/repos/USERNAME/REPO_NAME/dispatches", true);
    xhr.setRequestHeader("Accept", "application/vnd.github.v3+json");
    xhr.setRequestHeader("Authorization", "Bearer GITHUB_ACCESS_TOKEN");
    xhr.setRequestHeader("Content-Type", "application/json");

    xhr.onload = function() {
      if (xhr.status === 204) {
        messageElement.textContent = "요청이 성공적으로 전송되었습니다." + xhr.status;
      } else {
        messageElement.textContent = "요청 전송에 실패했습니다.<br>상태 코드: " + xhr.status;
      }
    };

    xhr.onerror = function() {
      messageElement.textContent = "요청 전송 중 알 수 없는 오류가 발생했습니다.";
    };

    xhr.send(JSON.stringify({"event_type": "RUN_WORKFLOW_DISPATCH"}));
  });
</script>
</body>
</html>
4-5. 배포버튼을 만들기 위해, 아래 링크 중 본인의 내용에 맞게 수정(아래 하이라이트 부분)한다.
<!DOCTYPE html>
<html>
<head>
  <meta charset="UTF-8">
  <style>
    .trigger-container {
      display: flex;
      flex-direction: column;
      align-items: center;
      text-align: center;
    }

    .trigger-button {
      display: inline-block;
      margin-bottom: 10px;
      padding: 10px 20px;
      background-color: #4c9aff;
      color: white;
      font-size: 16px;
      border: none;
      cursor: pointer;
      border-radius: 4px;
      box-shadow: 0px 2px 6px rgba(0, 0, 0, 0.1);
      transition: background-color 0.3s;
    }

    .trigger-button:hover {
      background-color: #2e86ff;
    }

    .message {
      font-size: 16px;
      color: #333;
    }
  </style>
</head>
<body>
  <div class="trigger-container">
    <button id="triggerButton" class="trigger-button">UPLOAD</button>
    <div id="message" class="message"></div>
  </div>

  <script>
  document.getElementById("triggerButton").addEventListener("click", function() {
    var messageElement = document.getElementById("message");
    messageElement.textContent = "요청 전송 중...";

    var xhr = new XMLHttpRequest();
    xhr.open("POST", "https://api.github.com/repos/USERNAME/REPO_NAME/dispatches", true);
    xhr.setRequestHeader("Accept", "application/vnd.github.v3+json");
    xhr.setRequestHeader("Authorization", "Bearer GITHUB_ACCESS_TOKEN");
    xhr.setRequestHeader("Content-Type", "application/json");

    xhr.onload = function() {
      if (xhr.status === 204) {
        messageElement.textContent = "요청이 성공적으로 전송되었습니다." + xhr.status;
      } else {
        messageElement.textContent = "요청 전송에 실패했습니다.<br>상태 코드: " + xhr.status;
      }
    };

    xhr.onerror = function() {
      messageElement.textContent = "요청 전송 중 알 수 없는 오류가 발생했습니다.";
    };

    xhr.send(JSON.stringify({"event_type": "RUN_WORKFLOW_DISPATCH"}));
  });
</script>
</body>
</html>
4-6. 배포 버튼을 링크로 만들기 위해 아래HTML블록생성 링크로 접속한다.
https://www.notion-tools.com/embeds/html
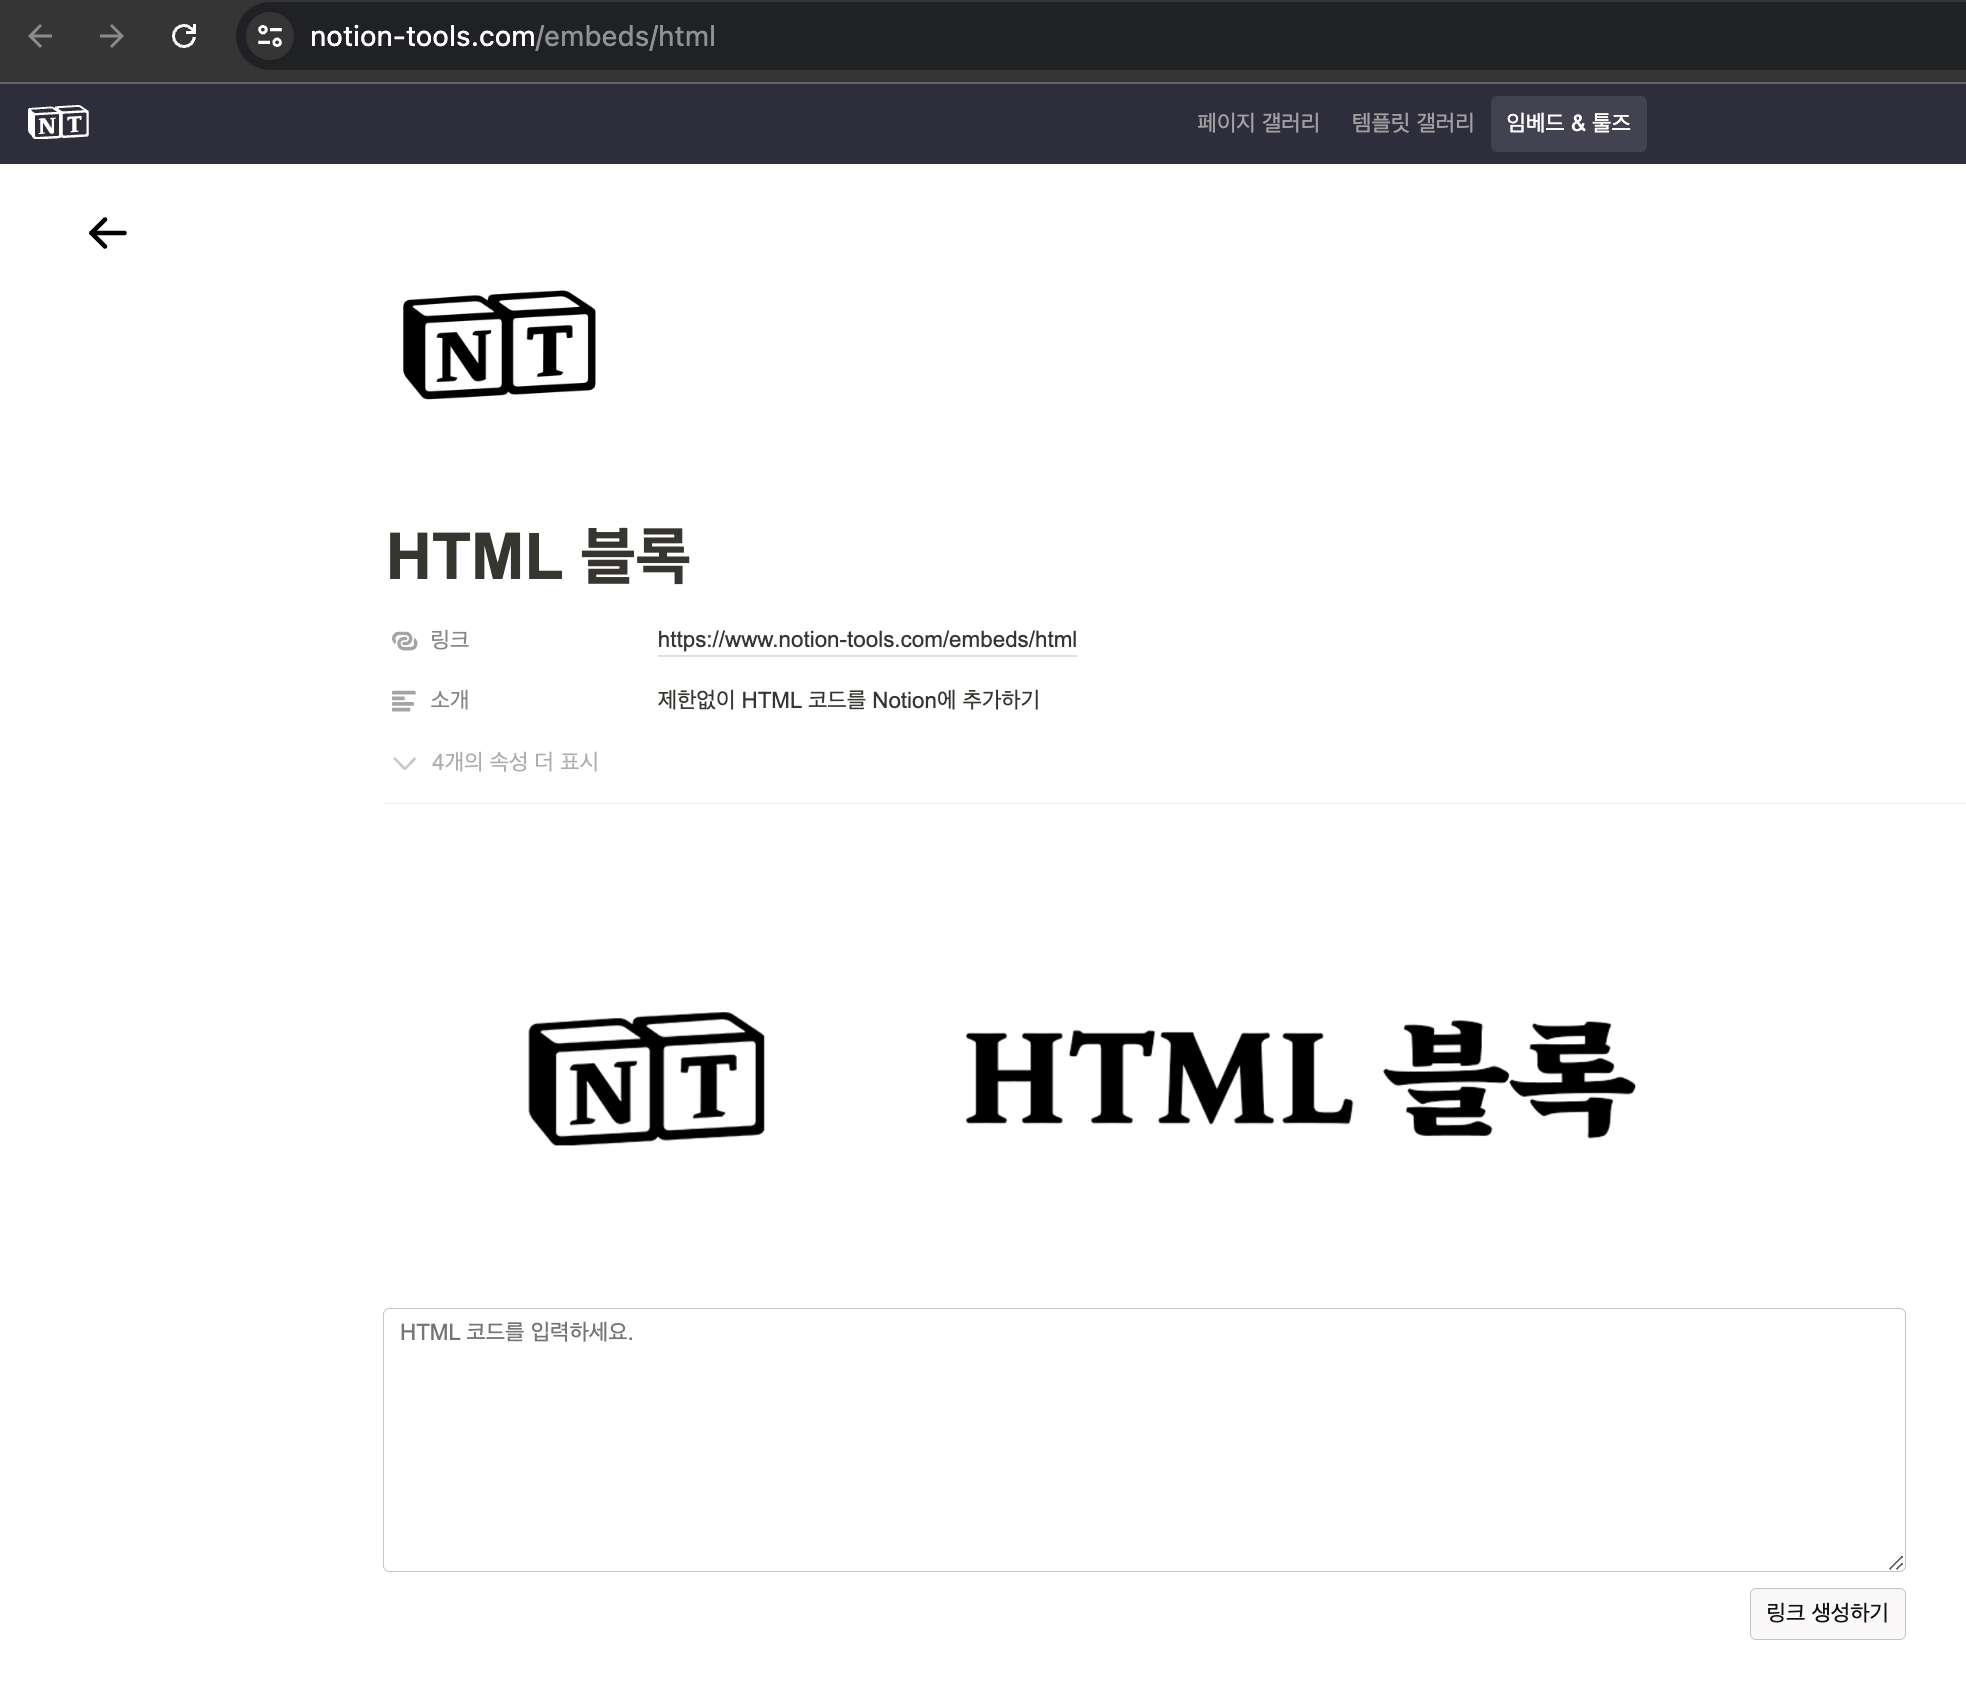
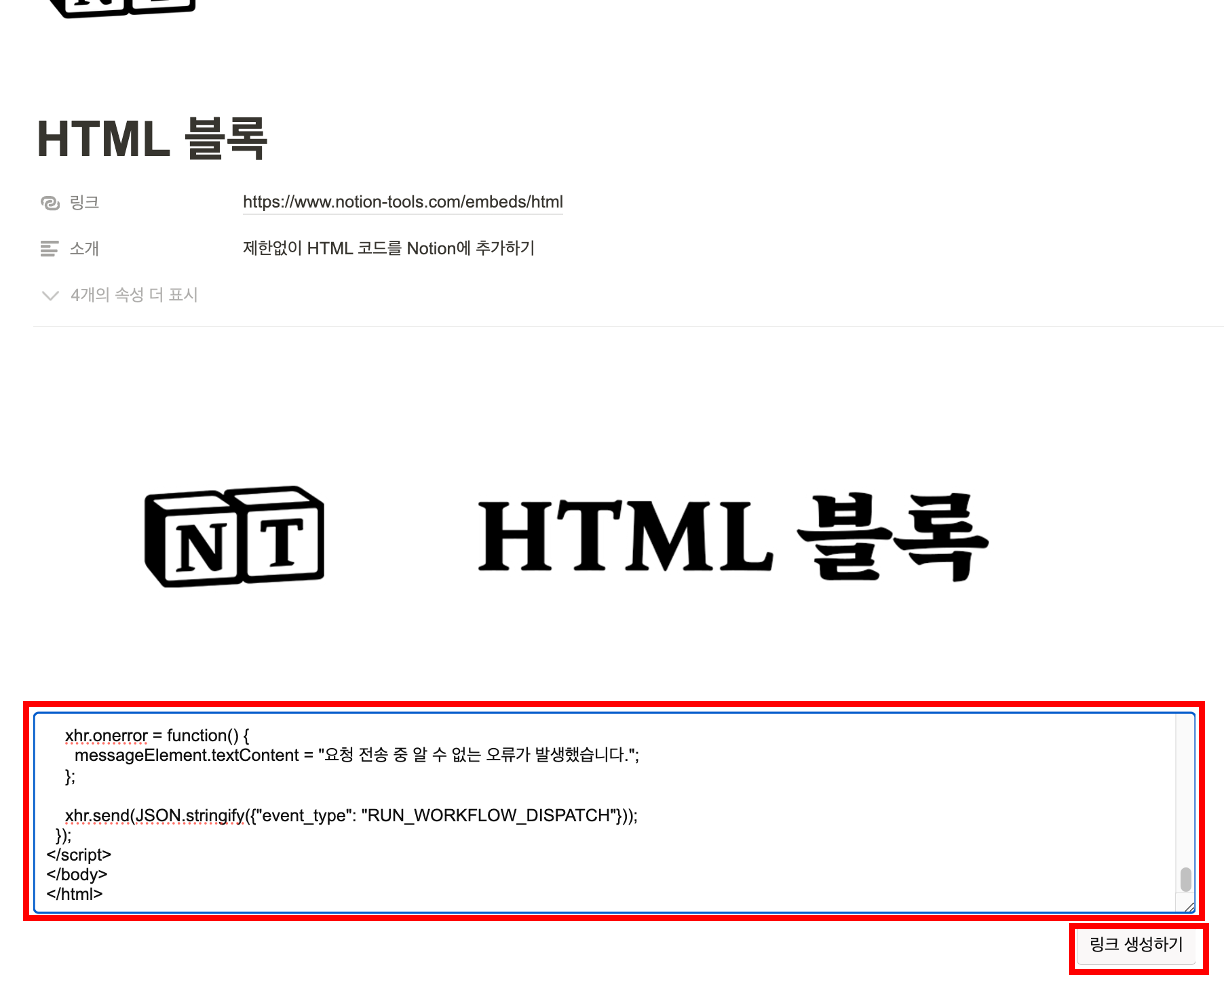
4-7. 위 ‘4-5’에서 만든 코드를 넣고 링크를 생성한다.
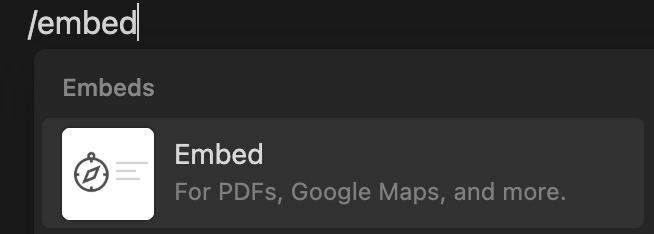
4-8. 노션에서 /embed 를 검색해서 임베드 블록을 생성한다.
4-9. 위 ‘4-7’에서 생성한 링크를 임베드 해준다.
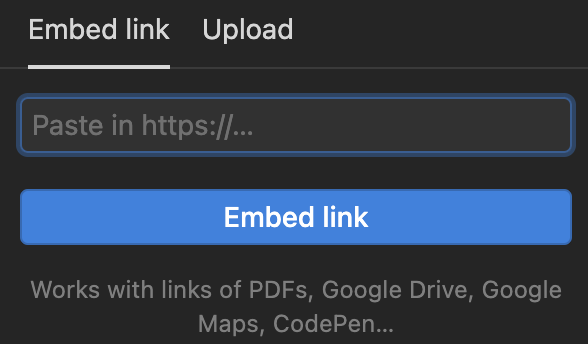
4-10. 생성된 배포 버튼(임베디드된 링크)
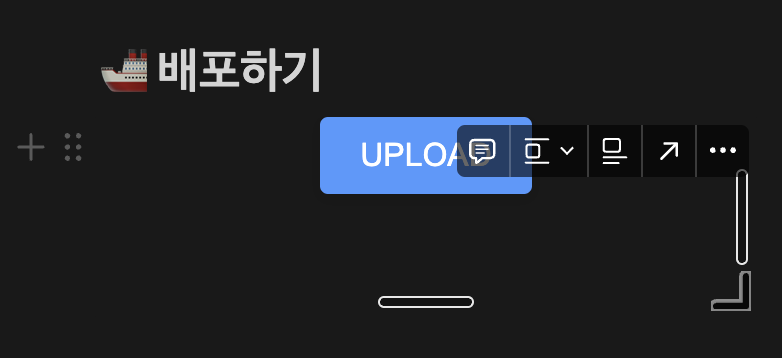
4-11. 업로드 버튼을 눌르면, 깃액션을 통해 봇으로 배포되는 것을 확인할 수 있다.

공유하기
Twitter Facebook LinkedIn◻ Sponsored by